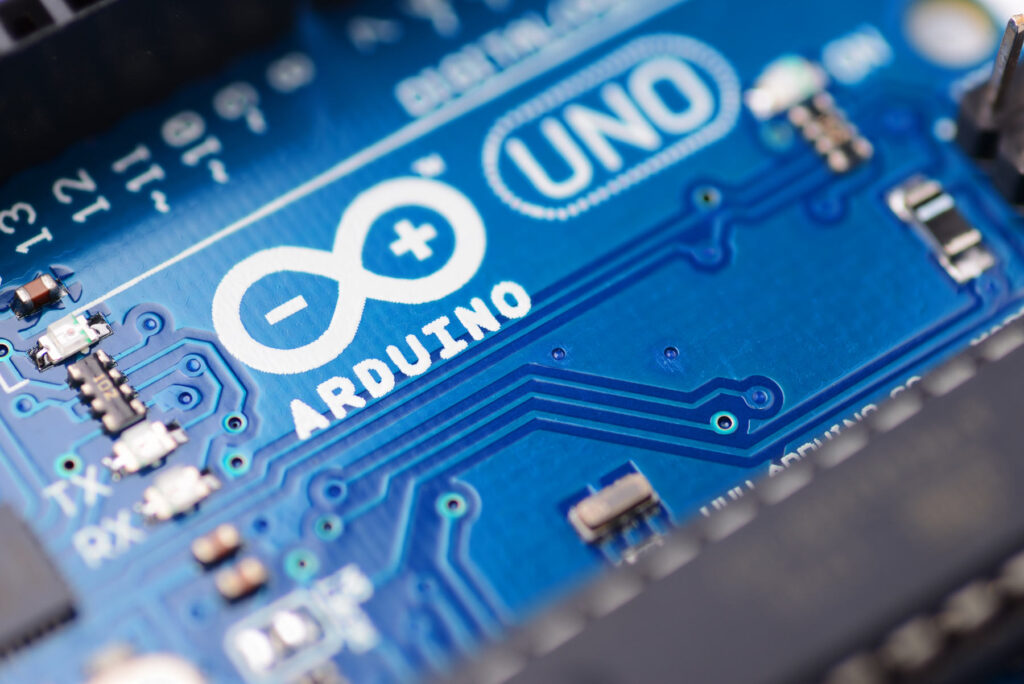
ARDUINO
WHAT IS ARDUINO?
- Arduino is a prototype platform (open-source) based on an easy-to-use hardware and software.
- It consists of a circuit board, which can be programed (referred to as a micro-controller)
- It also contains a ready-made software called Arduino IDE (Integrated Development Environment). Which is used to write and upload the computer code to the physical board.
- The micro-controllers can be programmed using the Embedded C Programming Language.
FEATURES OF ARDUINO
Arduino boards are able to read analog or digital input signals from different sensors and turn it into an output such as activating a motor, turning LED on/off, connect to the cloud and many other actions.
Over the years Arduino has been the brain of thousands of projects , from everyday objects to complex scientific instruments. A worldwide community of makers - students, hobbyists, artists, programmers, and professionals - has gathered around this open-source platform, their contributions have added up to an incredible amount of accessible knowledge that can be of great help to novices and experts alike.
Arduino can interact with buttons, LEDs, motors, speakers, GPS units, cameras, the internet, and even your smart-phone or your TV! This flexibility combined with the fact that the Arduino software is free, the hardware boards are pretty cheap, and both the software and hardware are easy to learn has led to a large community of users who have contributed code and released instructions for a huge variety of Arduino-based projects.
ADVANTAGES OF AN ARDUINO
Simple programming environment – The Arduino Software (IDE) is easy-to-use for beginners, yet flexible enough for advanced users to take advantage of as well. For teachers, it’s conveniently based on the Processing programming environment, so students learning to program in that environment will be familiar with how the Arduino IDE works.
Open source – The plans of the Arduino boards are published under a Creative Commons license, so experienced circuit designers can make their own version of the module, extending it and improving it. Even relatively inexperienced users can build the breadboard version of the module in order to understand how it works and save money.
- Inexpensive – Arduino boards are relatively inexpensive compared to other microcontroller platforms. The least expensive version of the Arduino module can be assembled by hand, and even the pre-assembled Arduino modules cost less than ₹4000
- Cross-platform – The Arduino Software (IDE) runs on Windows, Macintosh OSX, and Linux operating systems. Most microcontroller systems are limited to Windows.
Extensible software – The Arduino software is published as open source tools, available for extension by experienced programmers. The language can be expanded through C++ libraries, and people wanting to understand the technical details can make the leap from Arduino to the AVR C programming language on which it’s based. Similarly, you can add AVR-C code directly into your Arduino programs if you want to.
TYPES OF ARDUINO BOARDS
Arduino Uno
Arduino Leonard
Arduino Due
Arduino Zero
Arduino Yun Rev 2
SparkFun RedBoard
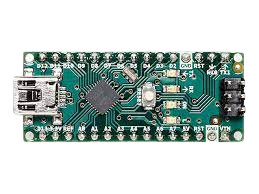
Arduino Nano
Arduino Esplora
Lilypad Arduino
Arduino Pro Mini
Arduino MKR Vidor
Sparkfun Pro Micro
Arduino Mega2560
Arduino Mini 05
Arduino Pro Mini
Arduino MKR Zero
Arduino MKR Wifi
Arduino Micro
IMAGES OF FEW OF THE ARDUINOS
Arduino Uno
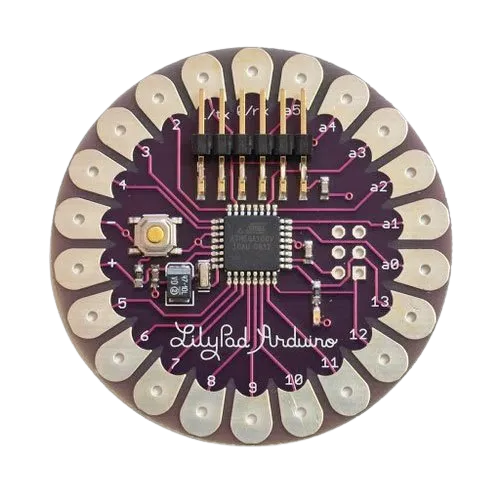
Lilypad Arduino
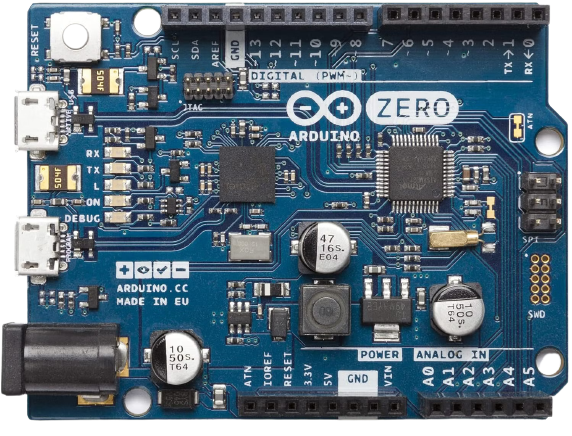
Arduino Zero
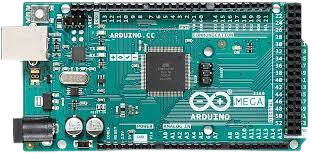
Arduino Mega
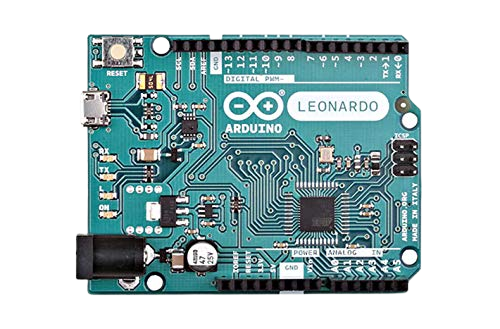
Arduino Leonardo
Arduino Nano
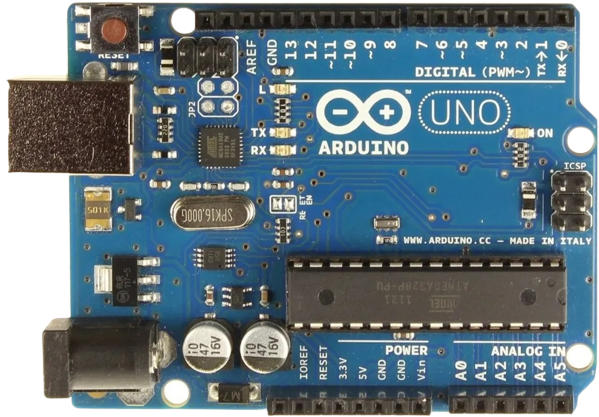
ARDUINO UNO BOARD DESCRIPTION
(This Description is valid for all the Arduinos)
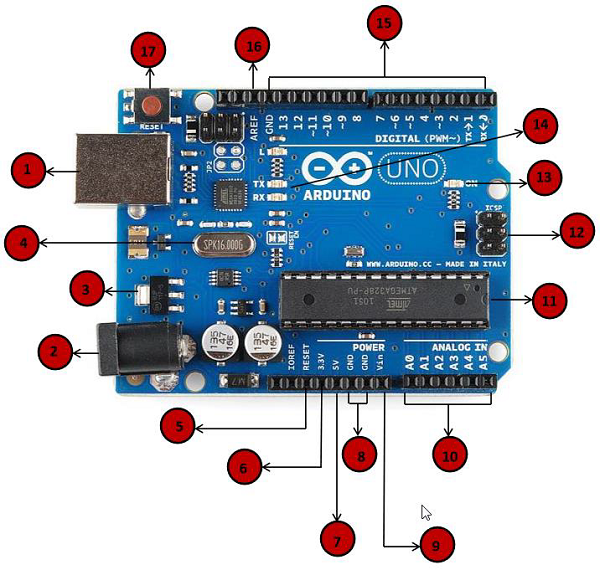
- Power USB – Arduino board can be powered by using the USB cable from your computer. All you need to do is connect the USB cable to the USB connection.
- Power (Barrel Jack) – Arduino boards can be powered directly from the AC mains power supply by connecting it to the Barrel Jack.
- Voltage Regulator – The function of the voltage regulator is to control the voltage given to the Arduino board and stabilize the DC voltages used by the processor and other elements.
Crystal Oscillator -The crystal oscillator helps Arduino in dealing with time issues. How does Arduino calculate time? The answer is, by using the crystal oscillator. The number printed on top of the Arduino crystal is 16.000H9H. It tells us that the frequency is 16,000,000 Hertz or 16 MHz.
Arduino Reset – You can reset your Arduino board, i.e., start your program from the beginning. You can reset the UNO board in two ways. First, by using the reset button on the board (17). Second, you can connect an external reset button to the Arduino pin labelled RESET (5).
- 3.3V Pin – Supply 3.3 output volt.
- 5V Pin – Supply 5 output volt.
- GND (Ground) − There are several GND pins on the Arduino, any of which can be used to ground your circuit.
- Vin − This pin also can be used to power the Arduino board from an external power source, like AC mains power supply.
- Analog pins – The Arduino UNO board has five analog input pins A0 through A5. These pins can read the signal from an analog sensor like the humidity sensor or temperature sensor and convert it into a digital value that can be read by the microprocessor.
- Main micro controller – Each Arduino board has its own microcontroller . You can assume it as the brain of your board. The main IC (integrated circuit) on the Arduino is slightly different from board to board. The microcontrollers are usually of the ATMEL Company. You must know what IC your board has before loading up a new program from the Arduino IDE. This information is available on the top of the IC. For more details about the IC construction and functions, you can refer to the data sheet.
- ICSP pin – Mostly, ICSP is an AVR, a tiny programming header for the Arduino consisting of MOSI, MISO, SCK, RESET, VCC, and GND. It is often referred to as an SPI (Serial Peripheral Interface), which could be considered as an “expansion” of the output. Actually, you are slaving the output device to the master of the SPI bus.
- Power LED indicator – This LED should light up when you plug your Arduino into a power source to indicate that your board is powered up correctly. If this light does not turn on, then there is something wrong with the connection.
- TX and RX LEDs – On your board, you will find two labels: TX (transmit) and RX (receive). They appear in two places on the Arduino UNO board. First, at the digital pins 0 and 1, to indicate the pins responsible for serial communication. Second, the TX and RX led. The TX led flashes with different speed while sending the serial data. The speed of flashing depends on the baud rate used by the board. RX flashes during the receiving process.
- Digital I/O – The Arduino UNO board has 14 digital I/O pins (of which 6 provide PWM (Pulse Width Modulation) output. These pins can be configured to work as input digital pins to read logic values (0 or 1) or as digital output pins to drive different modules like LEDs, relays, etc. The pins labeled “~” can be used to generate PWM.
- AREF – AREF stands for Analog Reference. It is sometimes, used to set an external reference voltage (between 0 and 5 Volts) as the upper limit for the analog input pins.
Arduino Reset – You can reset your Arduino board, i.e., start your program from the beginning. You can reset the UNO board in two ways. First, by using the reset button on the board (17). Second, you can connect an external reset button to the Arduino pin labelled RESET (5).